


The Complete Guide to Wood Wall Paneling: Trends, Installation & Costs in 2026

Is wall paneling still in style in 2026? What does it cost? Should you go vertical or horizontal? If you've been researching wall paneling, chances are you've run into a lot of conflicting information. This guide answers the most common questions homeowners and designers are asking right now — clearly, honestly, and with enough detail to actually help you make a decision.
Is Wall Paneling in Style in 2026?

Wall paneling is absolutely in style in 2026, and it shows no signs of slowing down. What has changed is the aesthetic direction. The trend has evolved well beyond the rustic shiplap and farmhouse-inspired looks that dominated the previous decade, moving toward richer, more architectural finishes that feel at home in both modern and transitional interiors.
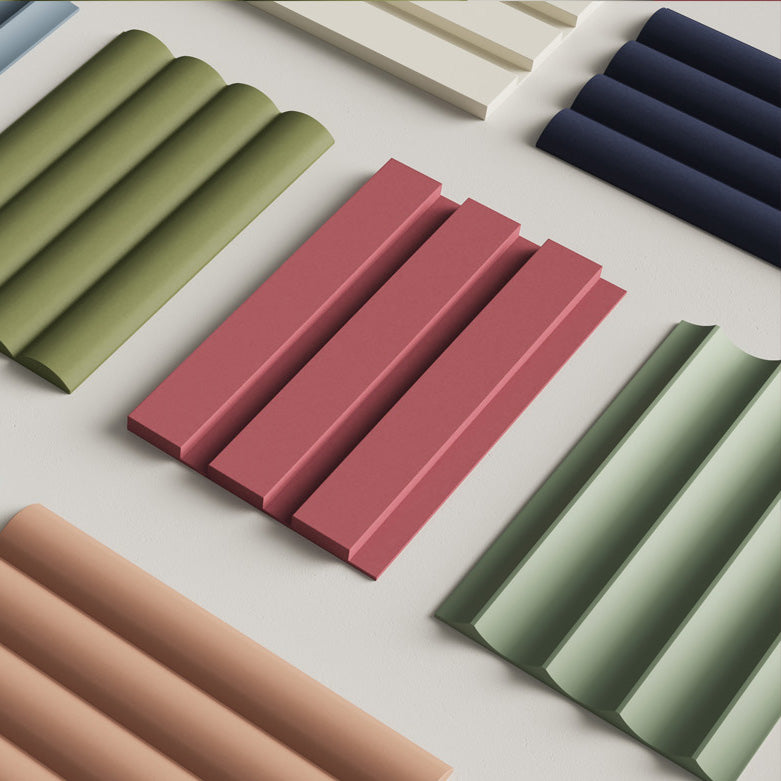
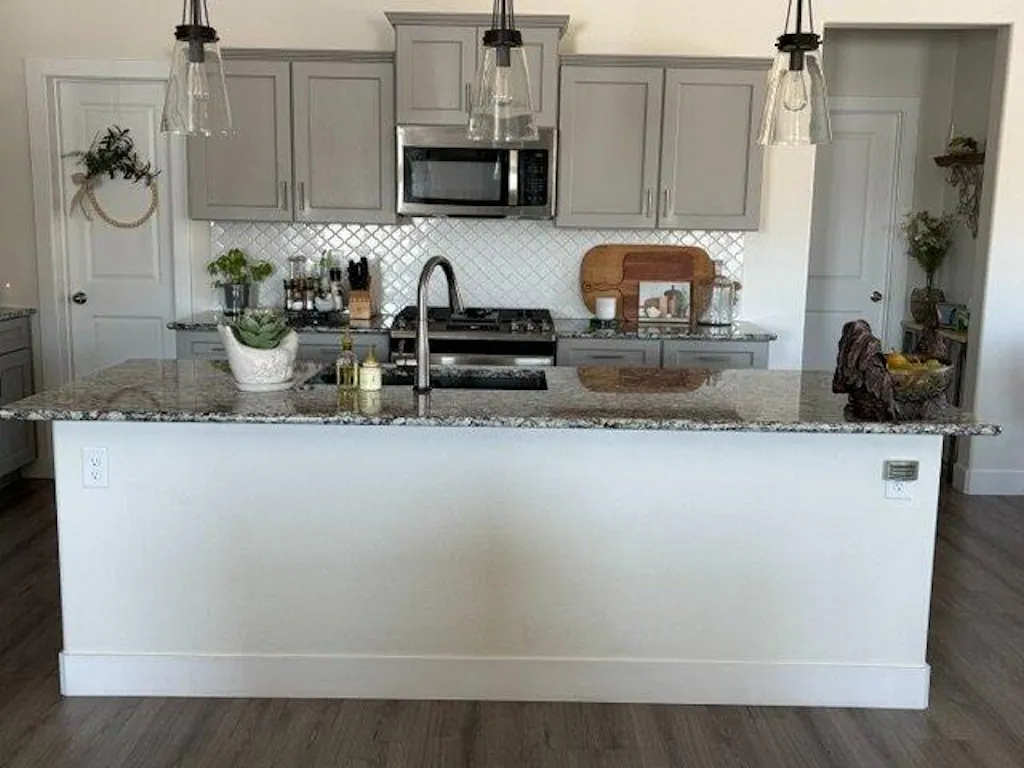
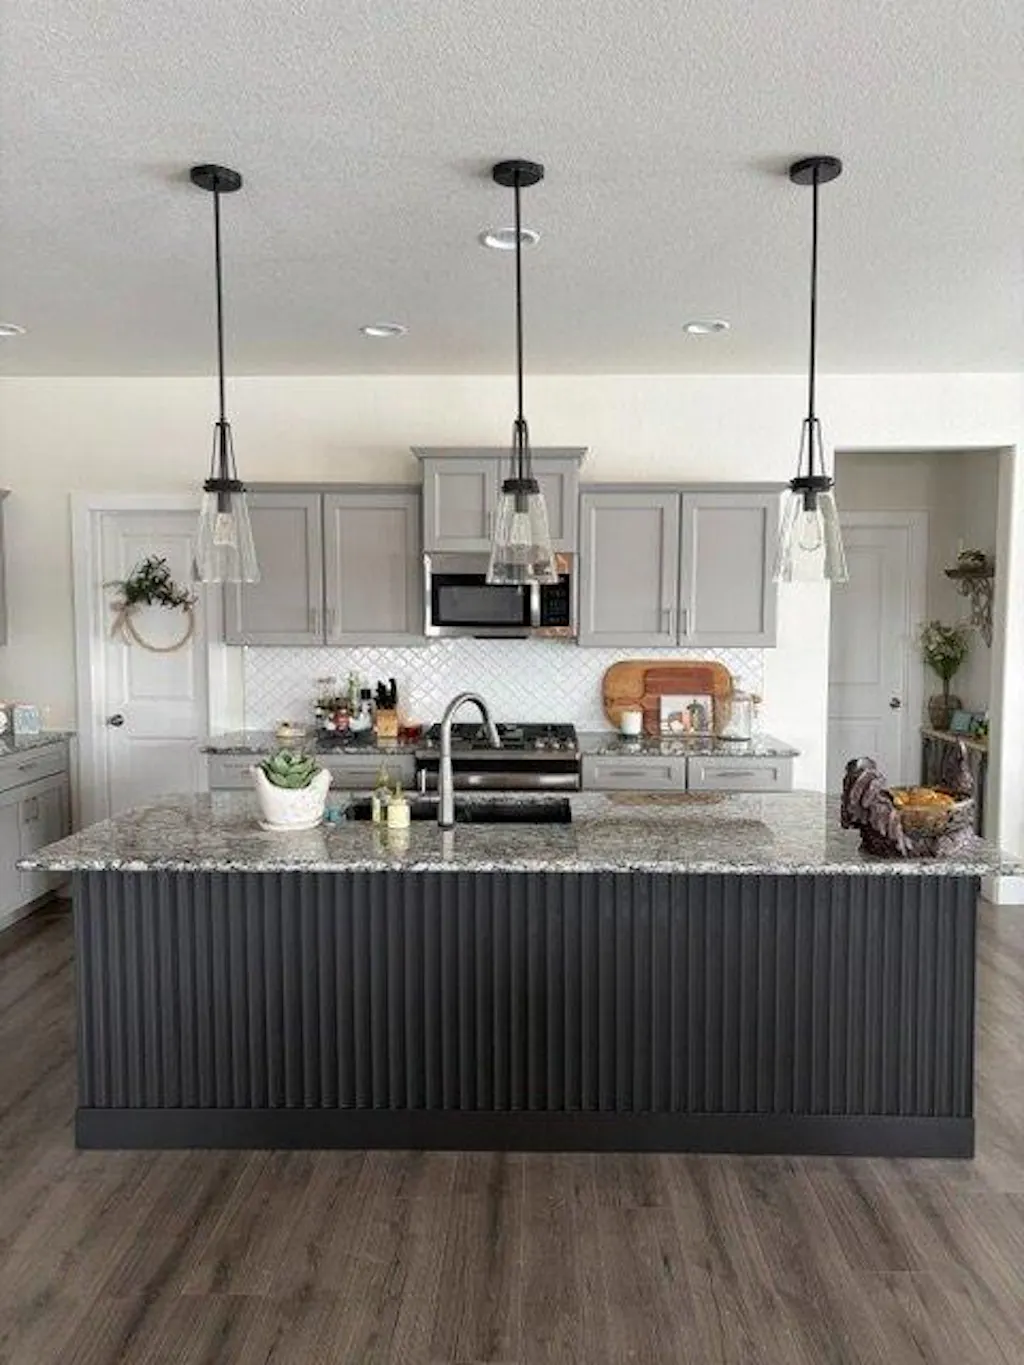
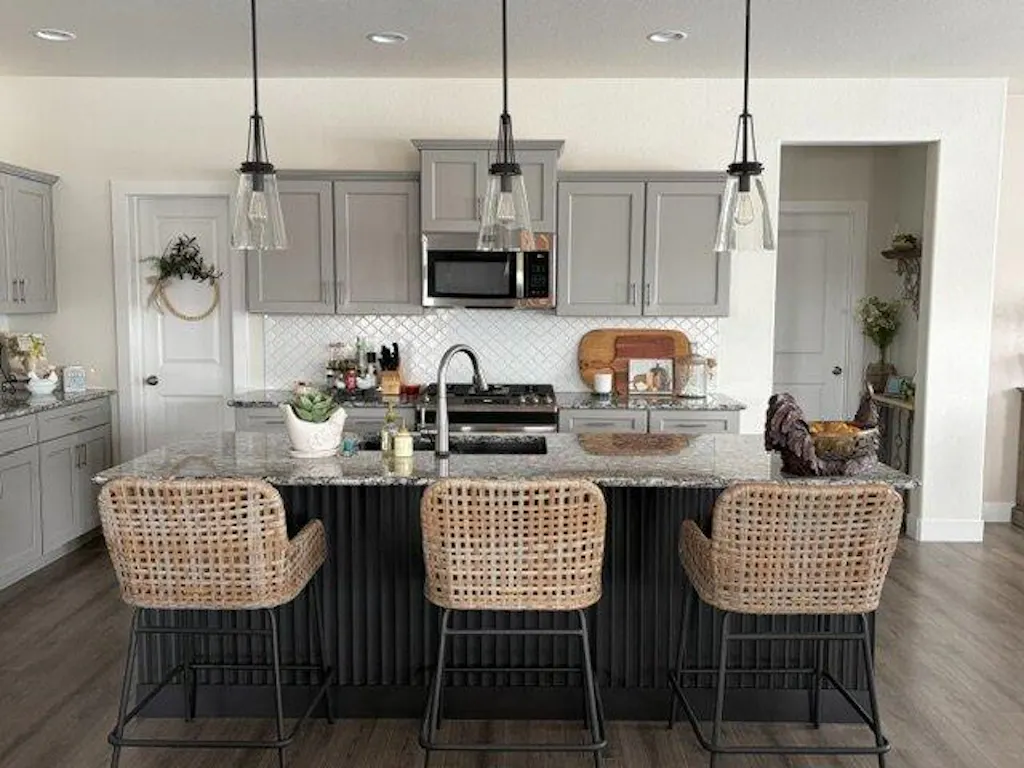
The styles generating the most interest right now are reeded and fluted profiles, wood slat walls, and organic wood-grain textures with warmer tones — particularly walnut shades paired with brass or matte black accents. Stone-inspired finishes and layered, tactile surfaces are also having a significant moment, as homeowners look to add depth and sophistication rather than just surface decoration.
The broader shift is from wall treatments that simply fill space to ones that define it. A well-chosen panel wall today functions less like wallpaper and more like architectural detail — it changes how a room feels spatially, acoustically, and visually.
What Is the Latest Trend for Wall Decor?

The latest trend in wall decor is moving away from purely decorative, hung-on-the-wall approaches toward integrated, textural wall treatments that are built into the room itself. While oversized art and large-scale prints remain popular as focal points, the most forward-thinking interiors in 2026 are combining both — using a textured panel wall as the backdrop against which statement pieces and lighting are layered.
Nature-inspired materials are central to this trend. Real wood surfaces, tactile grooves, and organic grain patterns are appearing across bedrooms, living rooms, home offices, and even kitchens and bathrooms. The appeal is the sense of warmth and permanence they bring — qualities that paint and wallpaper struggle to replicate.
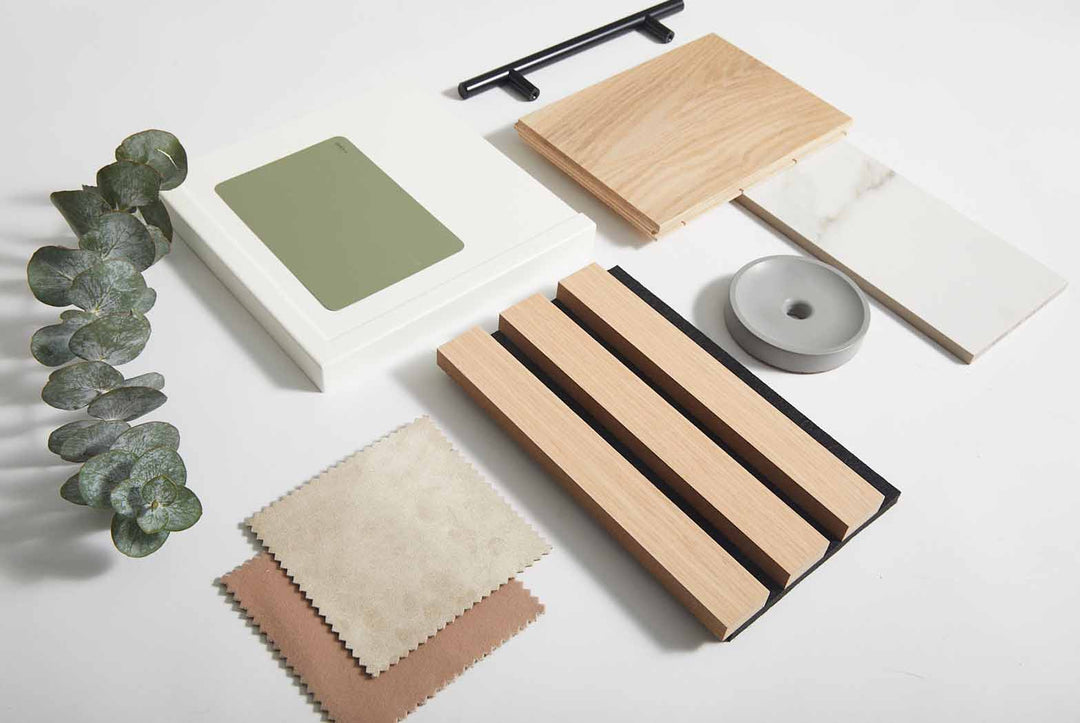
For those looking to incorporate this trend, pre-finished wood veneer wall panels offer one of the most accessible entry points: the surface is real wood, the installation is DIY-friendly, and no staining or finishing is required after installation.
What Trend Is Replacing Shiplap?

Shiplap had an extraordinary run, but the consensus among designers is clear: fluted and reeded panels, wood slat walls, and board and batten are the styles taking its place. Each offers something shiplap doesn't — more visual texture, more architectural presence, and a more contemporary sensibility.
Here's a breakdown of the most popular alternatives:
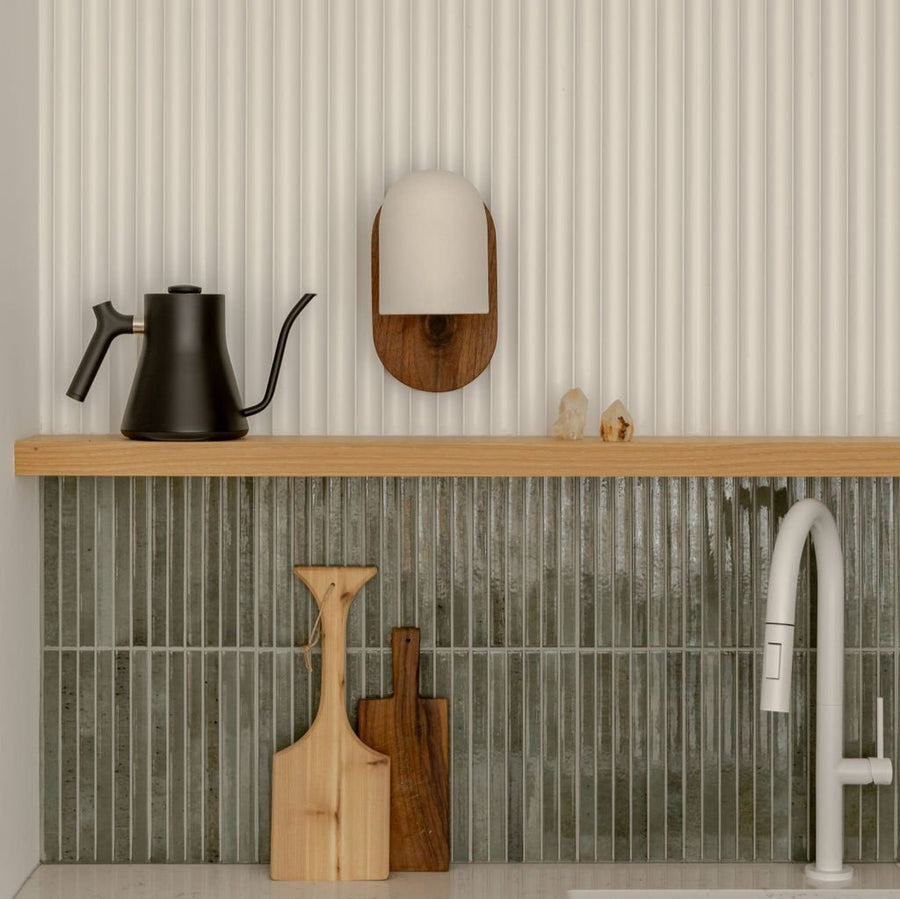
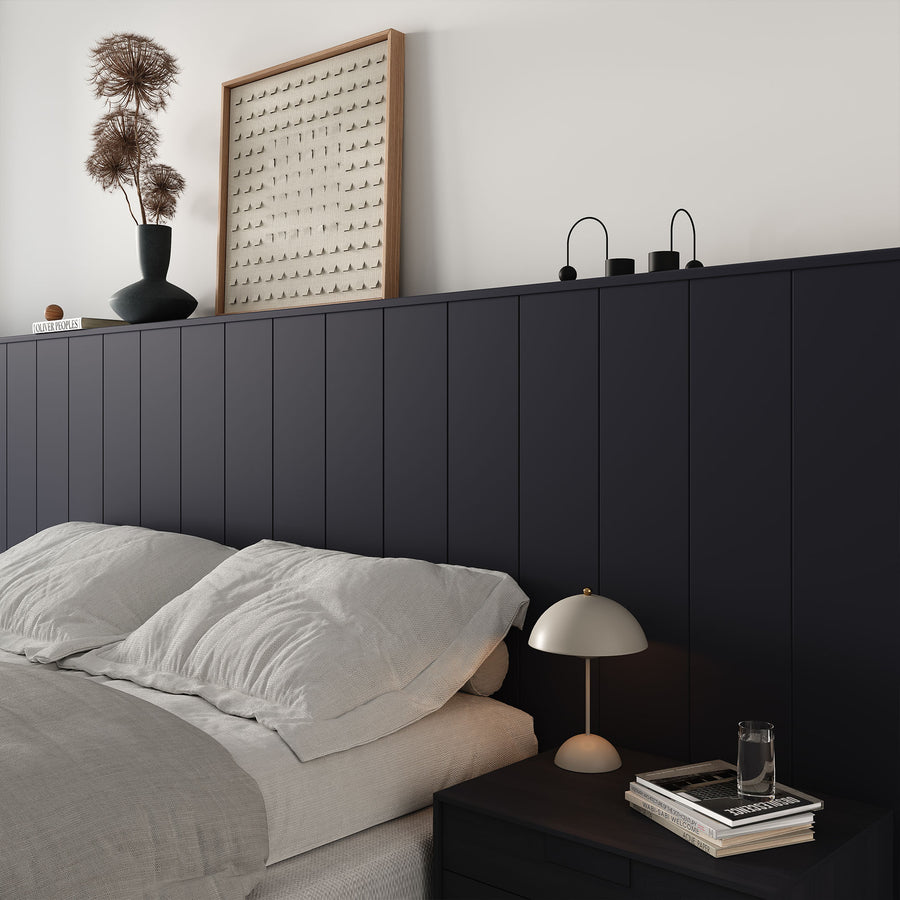
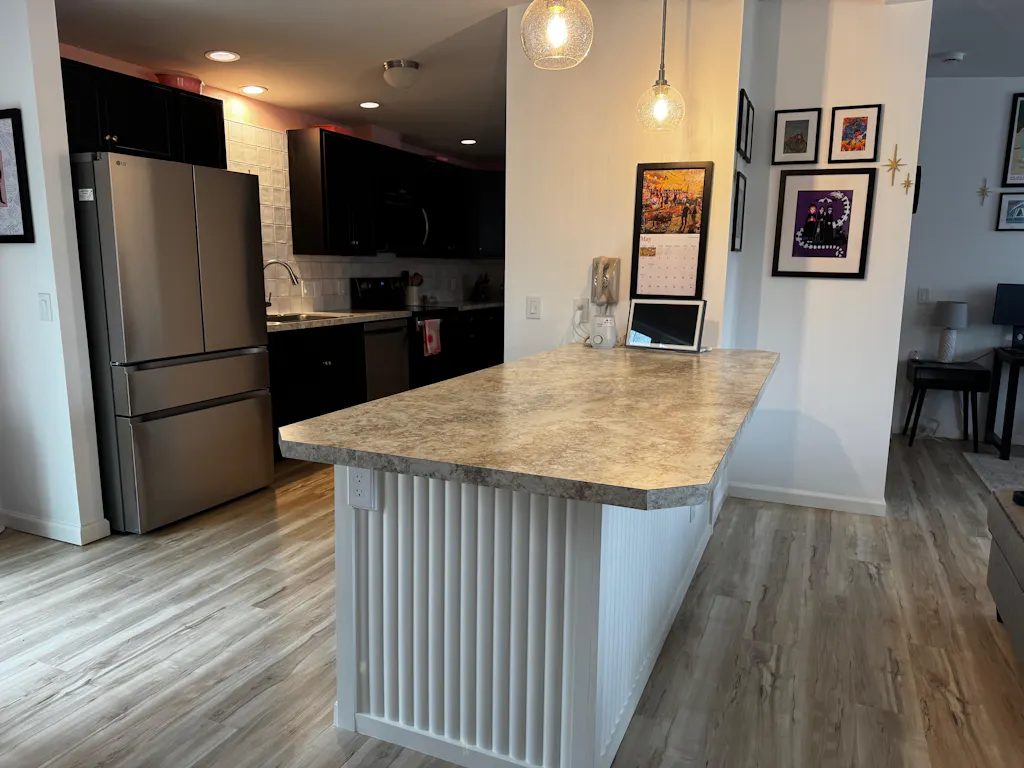
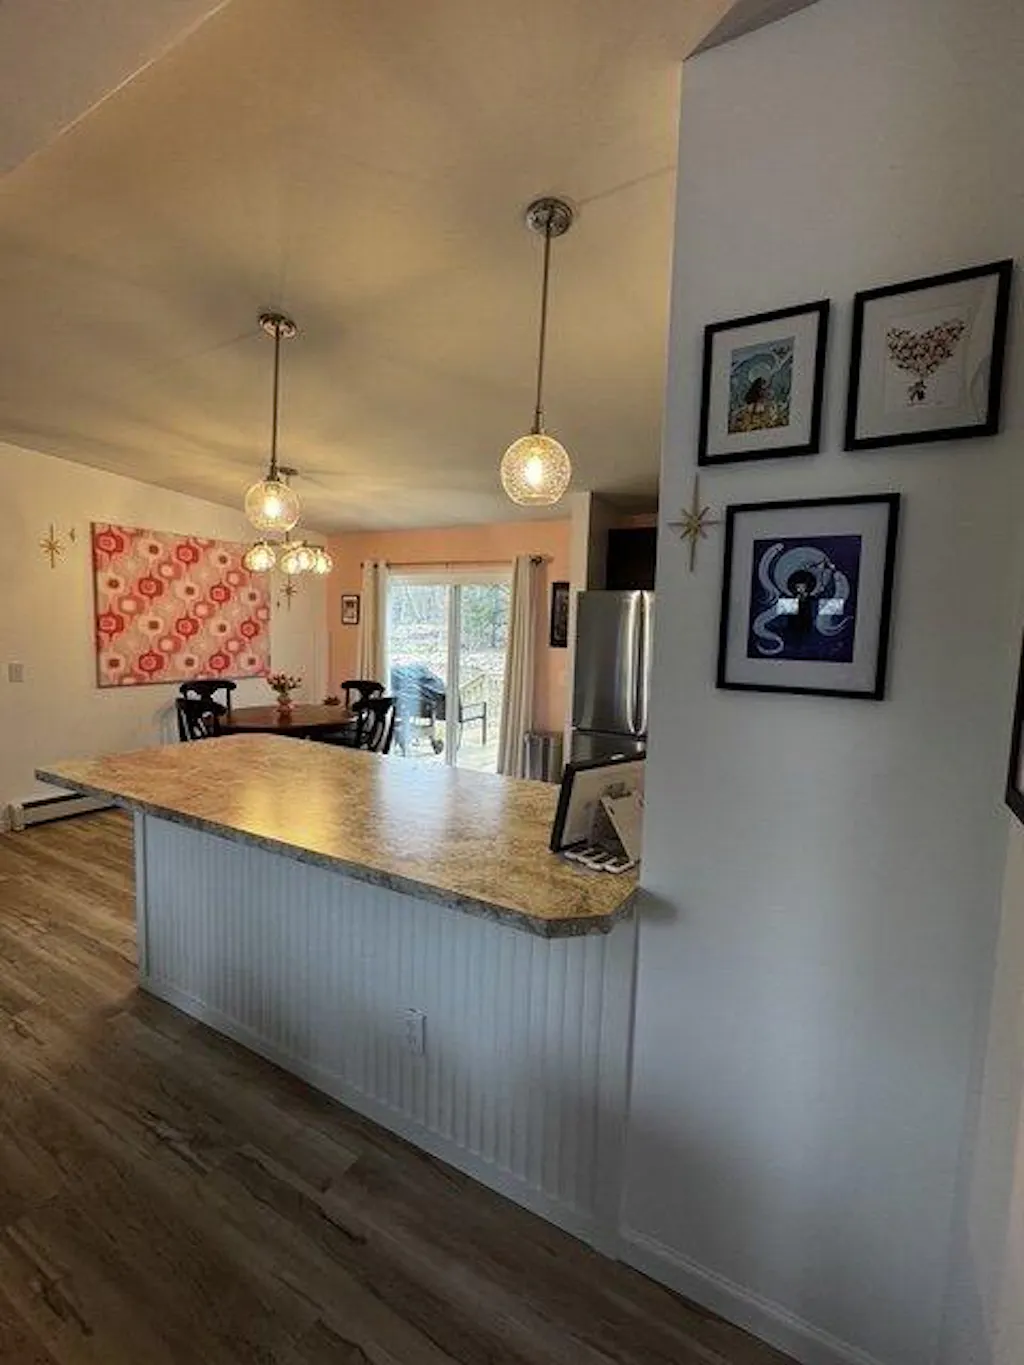
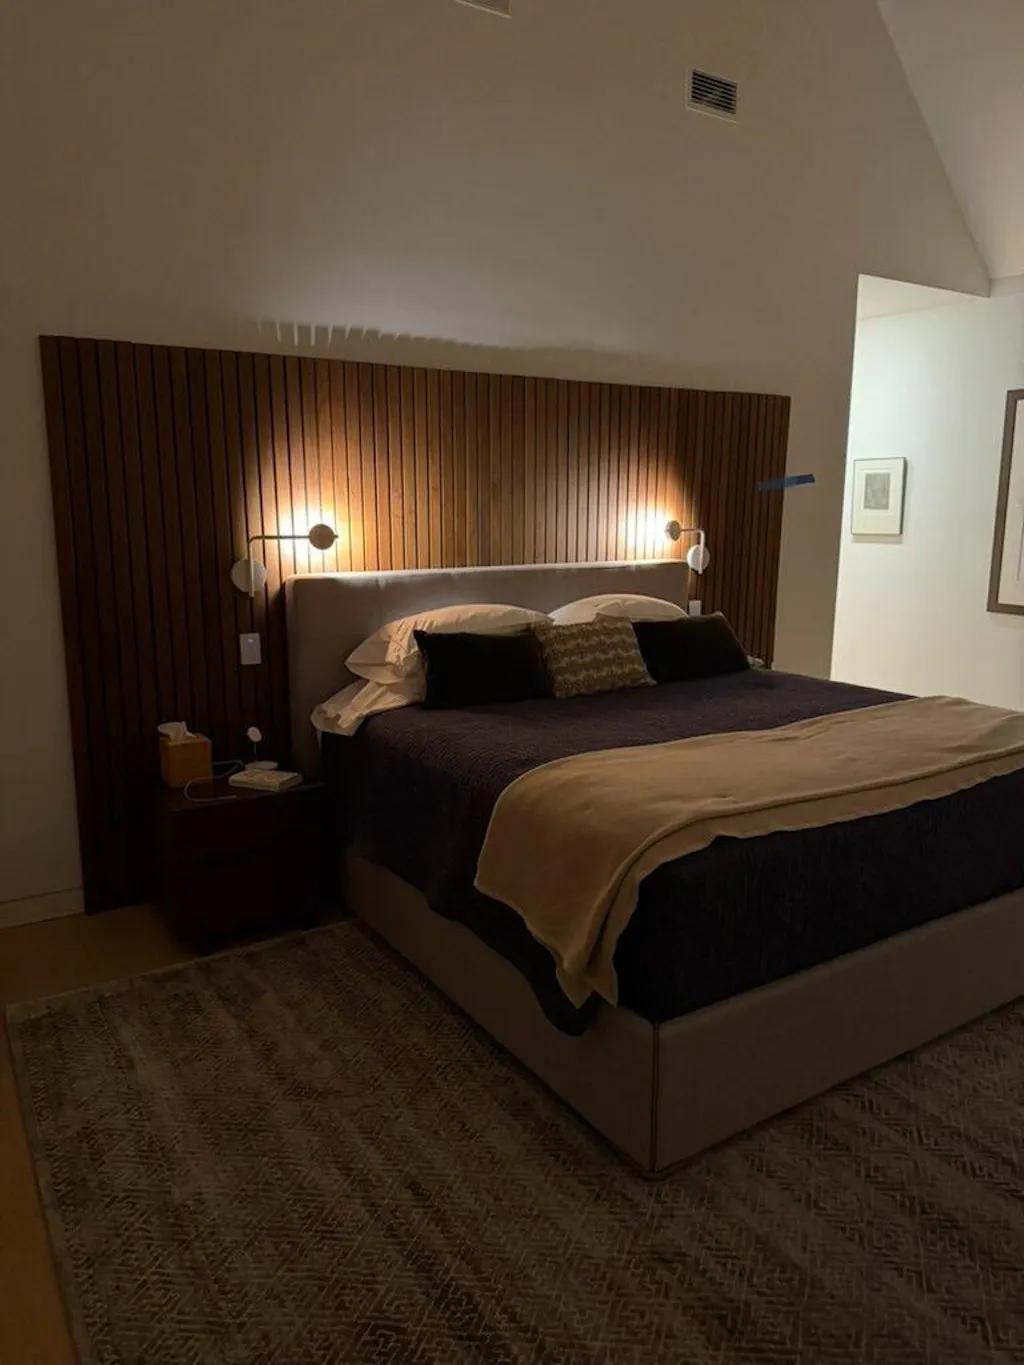
Fluted and Reeded Panels create repeating vertical grooves that produce a subtle shadow play across the wall, giving a surface far more depth than flat shiplap. They work particularly well in entryways, living rooms, and behind beds as headboard walls. Paintable fluted panels are a budget-friendly way to try this look, while real wood veneer fluted panels deliver a premium finish without any painting required.
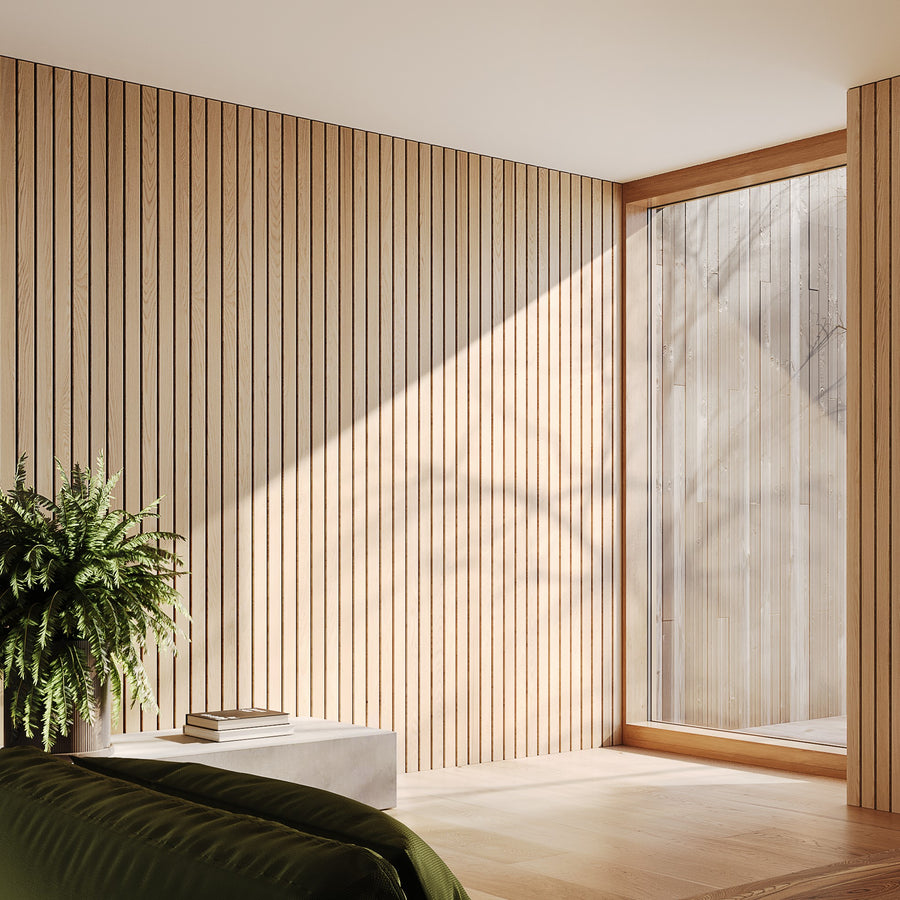
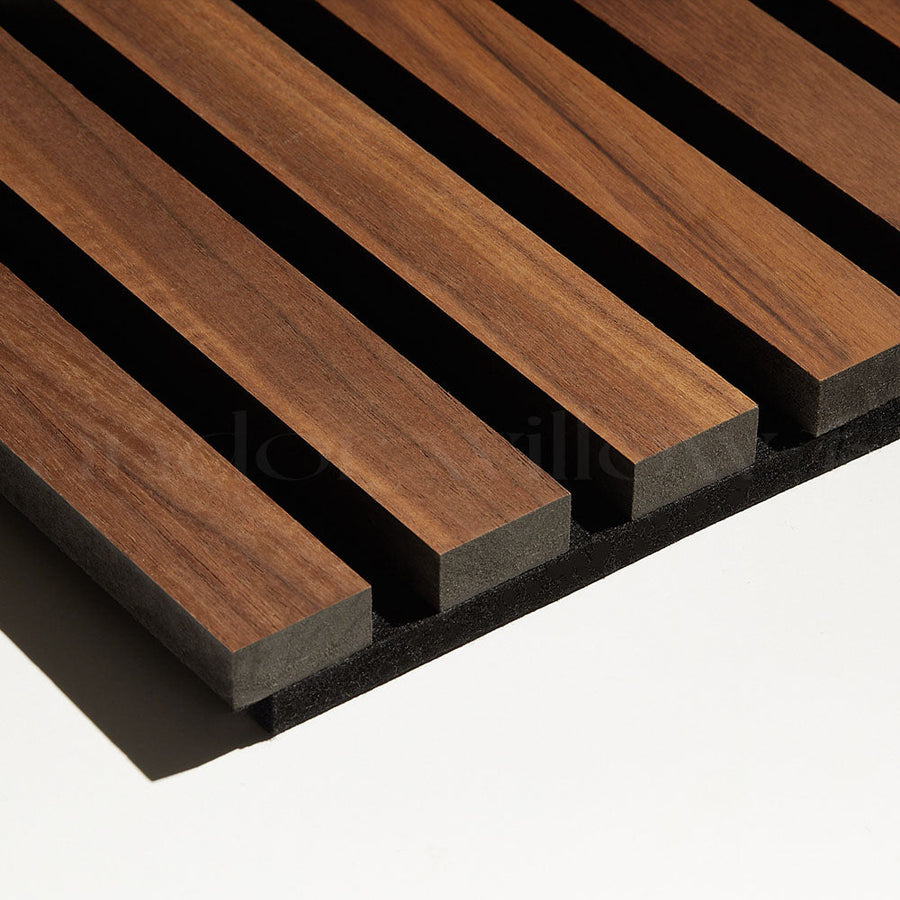
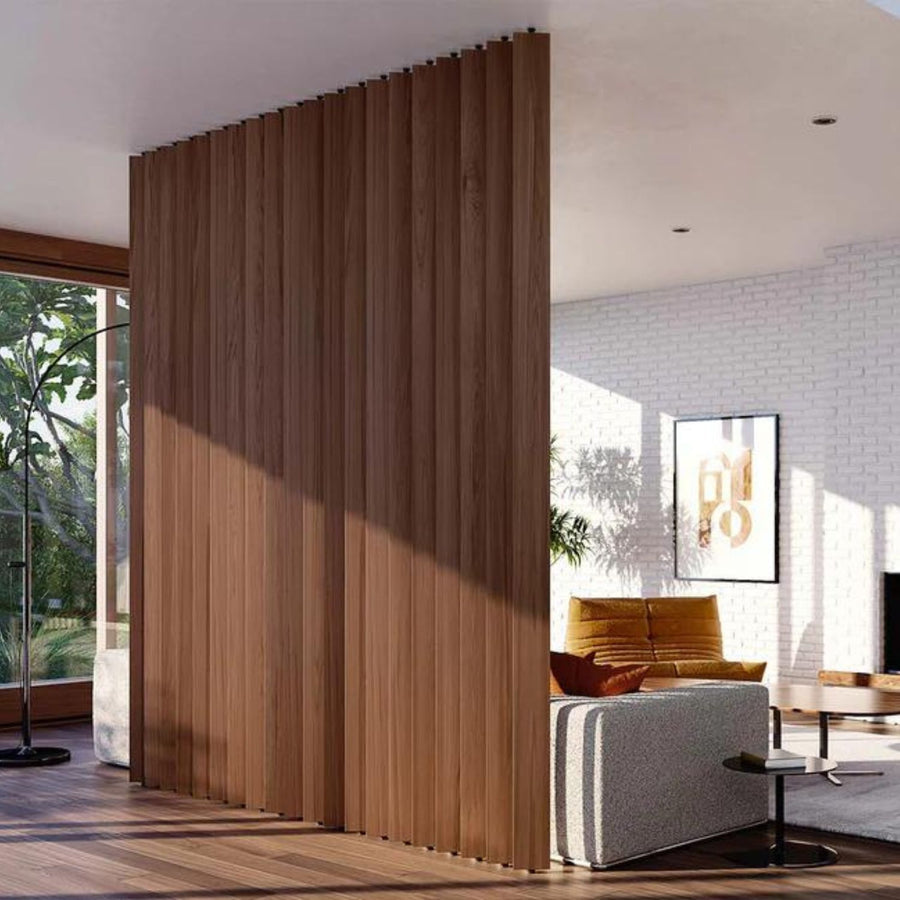
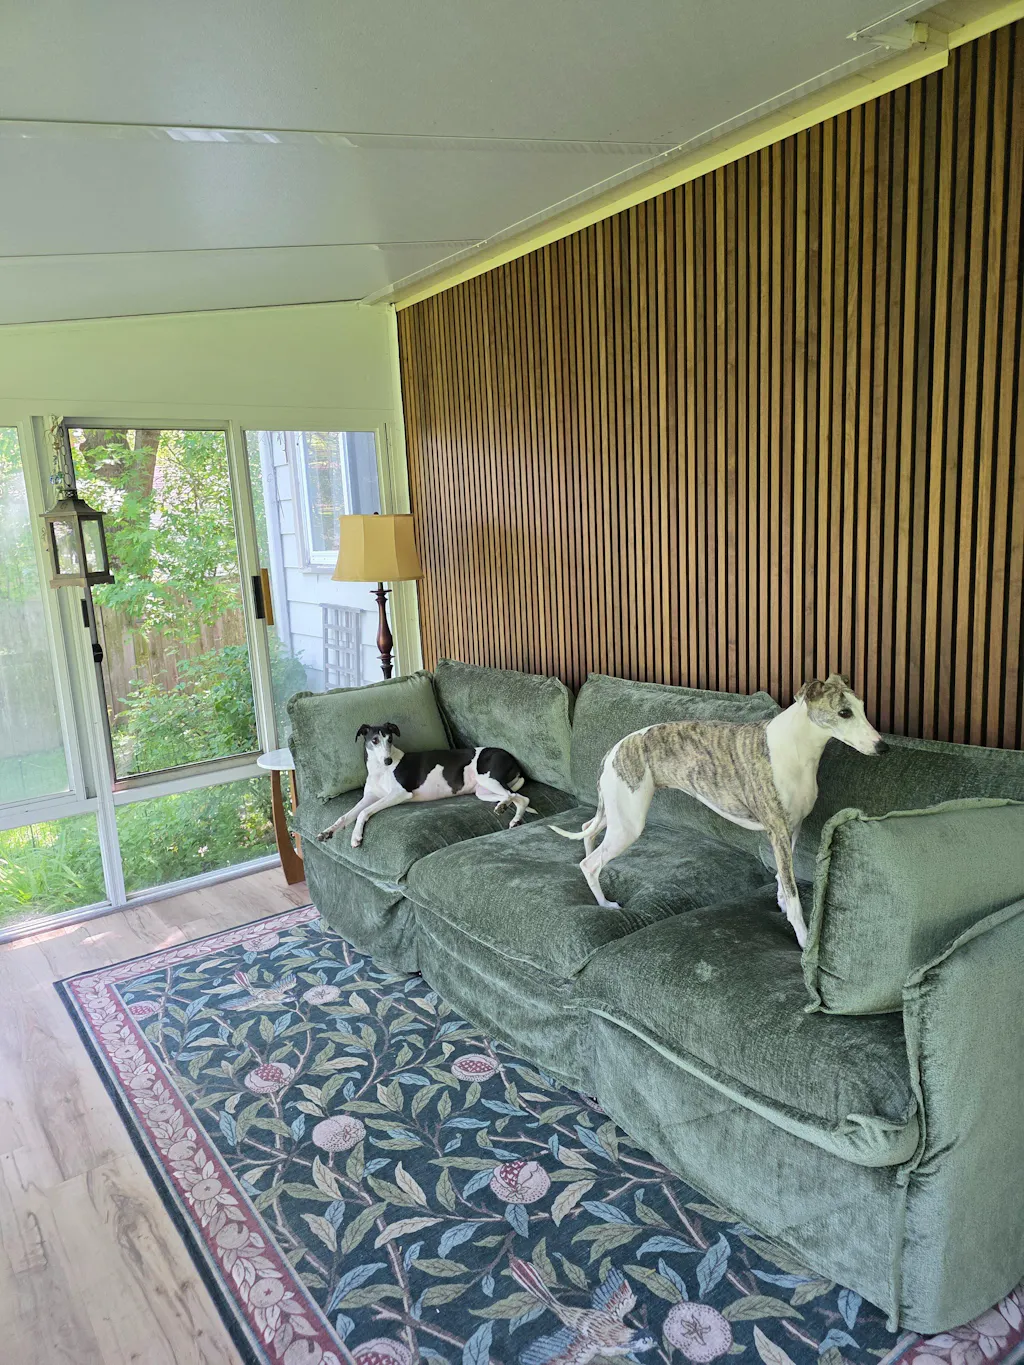
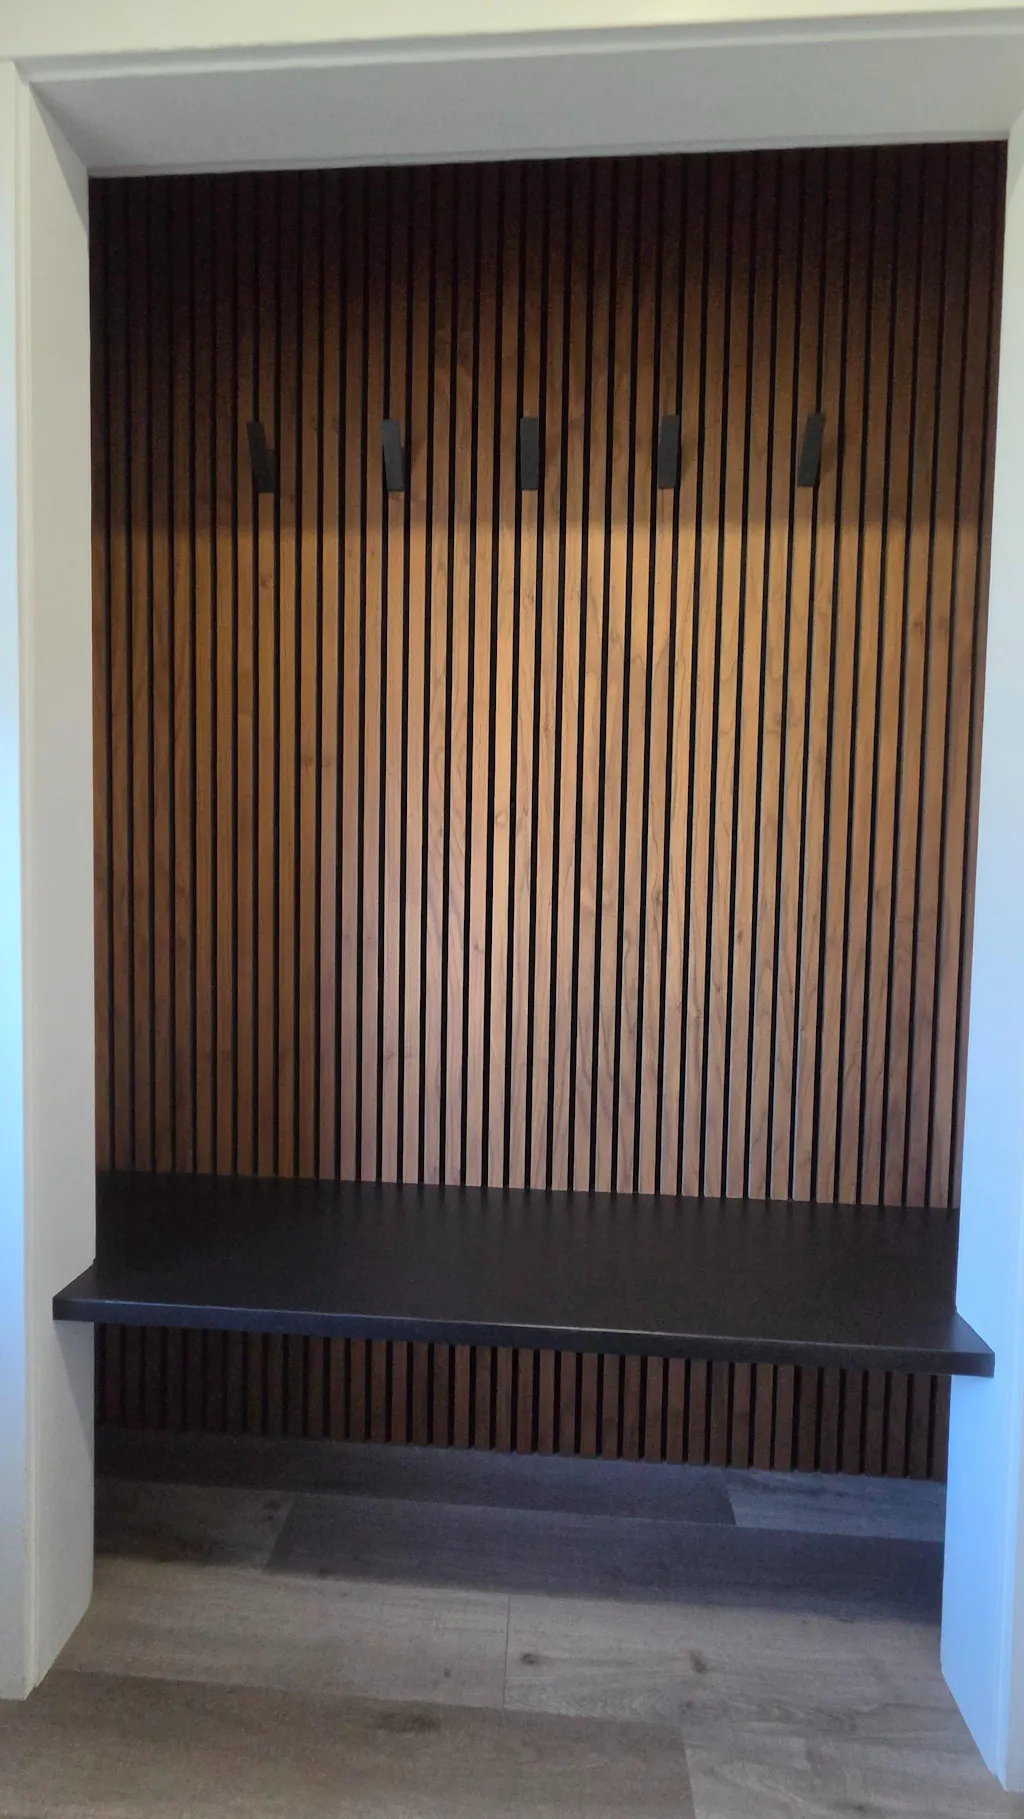
Wood Slat Walls take a different approach — instead of a routed groove pattern, individual wood slats are mounted with deliberate gaps between them, creating a rhythm of light and shadow across the surface. The best versions use real wood veneer slats mounted on a felt or fabric backing, which also provides acoustic benefits. This is one of the most searched panel styles of the past two years, particularly for living rooms and home offices.
Board and Batten remains a strong choice for those who want a more classic, formal look. It works beautifully in dining rooms and hallways and pairs well with bold paint colors.
V-Groove Paneling is another rising alternative — a clean, linear groove pattern that can be installed either vertically or horizontally, offering versatility that shiplap doesn't. Some V-groove panels are reversible, giving you the choice between two different groove spacings on the same panel.

The common thread across all of these is a move toward more refined texture and architectural detail — more sophisticated than shiplap's rustic horizontal lines, but equally achievable for a DIY installer.
Should Wood Paneling Be Horizontal or Vertical?
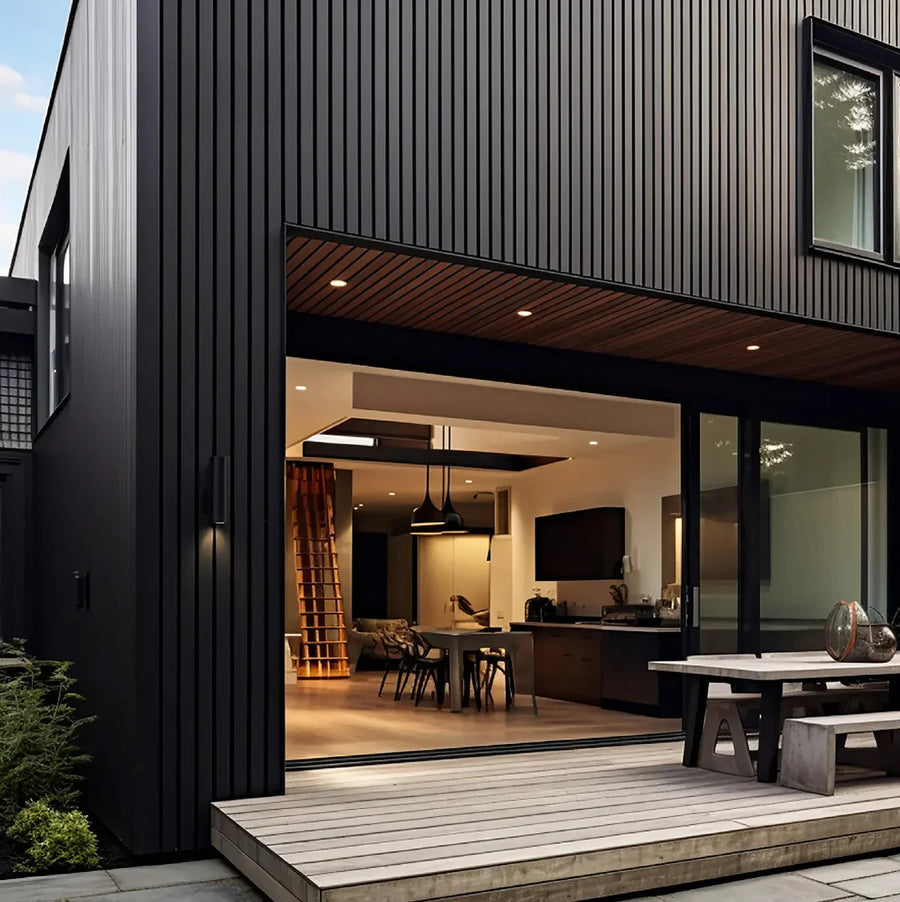
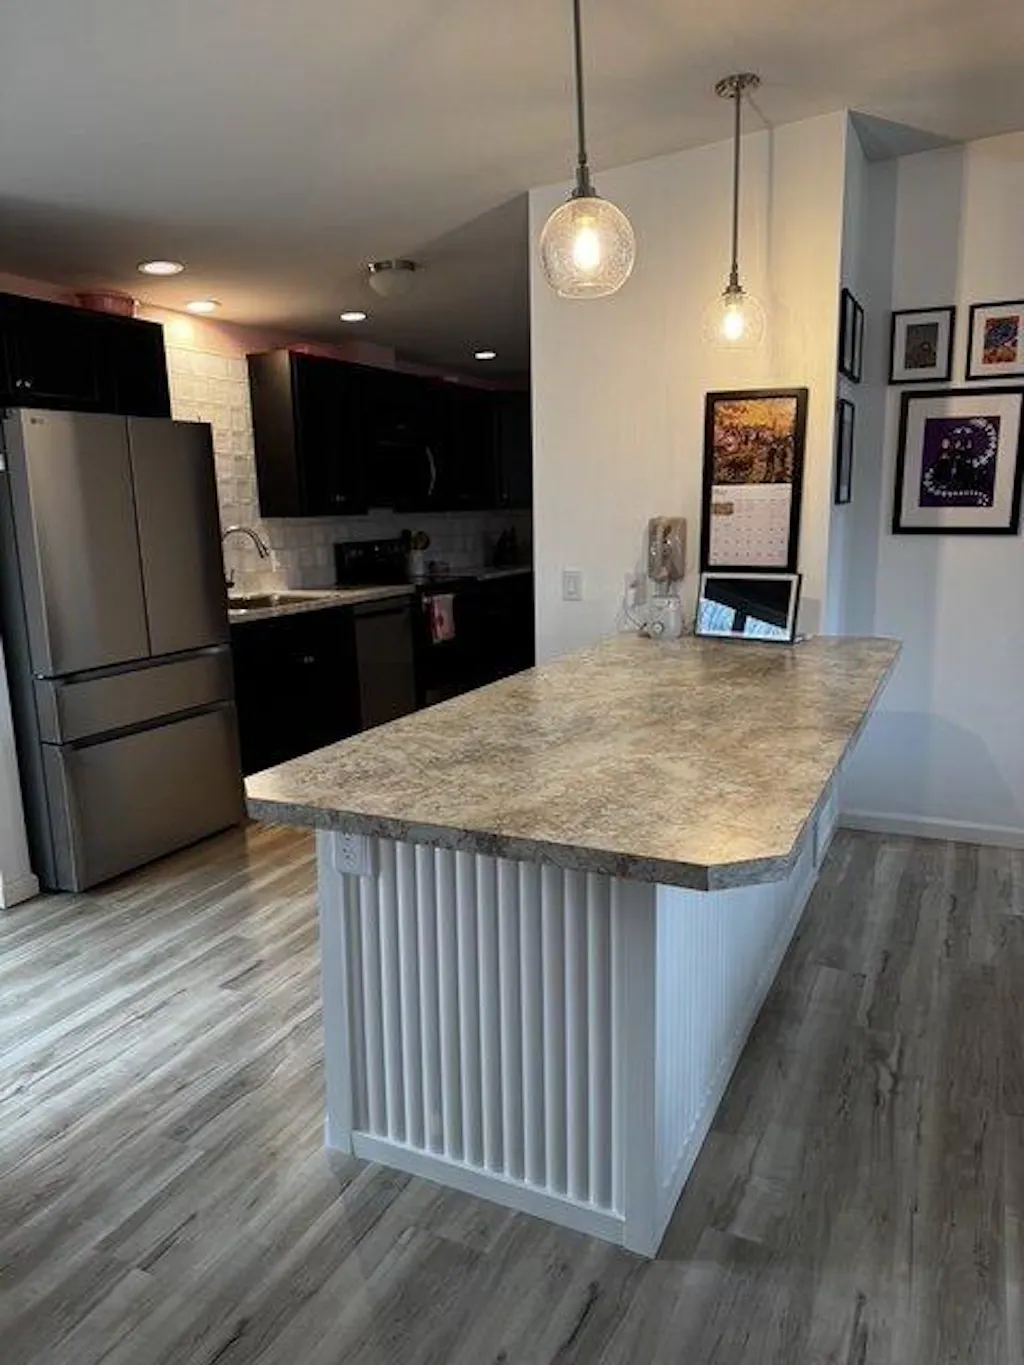
For most applications, vertical paneling is the stronger choice — and it's also the more popular one. Vertical lines draw the eye upward, making ceilings feel higher and rooms feel taller. This is especially valuable in spaces with standard 8' or 9' ceilings, where a horizontal treatment can inadvertently make the room feel squat.
Vertical paneling is also generally easier to keep clean, since dust and debris tend to fall away rather than accumulate in horizontal grooves or ledges.
That said, horizontal installations have their place. They can make a narrow room feel wider, work well as wainscoting below a chair rail, and suit certain panel types — particularly V-groove and tongue-and-groove panels — that are specifically designed to be installed either way.
The direction you choose should ultimately serve the geometry of the room. Measure your wall height and width, consider what the space needs visually, and let that guide the decision rather than defaulting to one or the other.
Are Fluted Wall Panels Easy to Install?

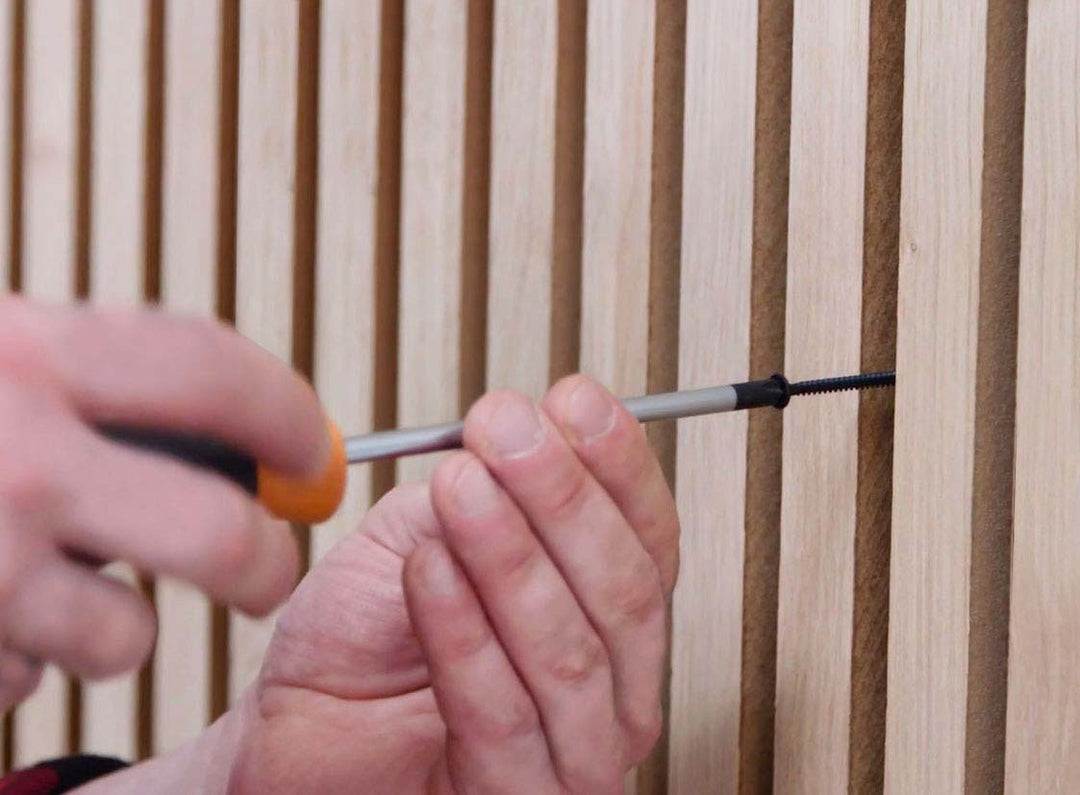
Fluted wall panels are among the more DIY-friendly wall treatments available, provided you approach the installation with the right preparation. The process itself — measuring, cutting, and fastening panels to a wall — is well within reach for anyone comfortable using basic tools like a drill, level, and circular saw.
The steps that most commonly trip up first-time installers are:
Surface preparation. The wall needs to be clean, dry, and reasonably flat before any panels go up. Irregularities in the wall surface will show up as gaps between panels, which are harder to fix after the fact.
Acclimation. MDF-based panels — including most paintable fluted styles — need to sit in the installation space for at least 48 hours before being installed. This allows the material to adjust to the room's temperature and humidity and dramatically reduces the risk of warping or joint failure after installation. Skipping this step is one of the most common reasons panels fail.
Accurate measuring. Plan your layout before you start cutting. Account for outlets, windows, door frames, and any corners where panels will need to meet. Cutting around these features is straightforward with a circular saw or jigsaw, but it requires forethought.
Choosing the right fastening method. Most fluted panels can be installed with construction adhesive, screws, or finishing nails. Adhesive alone works well on walls but should not be used as the sole fastening method on ceilings. Screws offer the most secure hold but leave holes that need to be filled and sanded before painting. Finishing nails are a good middle ground for wood-backed walls and stud installations.
With the right preparation, a standard accent wall can realistically be completed in a day by a motivated DIYer.
What Should You Stick Wood Paneling Up With?
The right adhesive for wood paneling depends on the panel material and the surface it's being applied to. As a general rule, construction-grade grab adhesive rated for use on both wood and PVC surfaces is the most versatile option — most modern wall panels use a PVC backing, and not all adhesives bond well to both surfaces simultaneously.
Apply the adhesive to the back of the panel in a criss-cross formation to ensure even coverage, then press the panel firmly against the wall. Using a level as you work is essential — adhesive grabs quickly, and a panel that sets at an angle is difficult to correct.
A few important caveats:
-
Do not use adhesive alone on ceilings. Gravity works against you, and even strong adhesive can fail over time without mechanical fasteners to back it up. For ceiling installations, combine adhesive with finishing nails driven into joists.
-
Finishing nails alongside adhesive are recommended on walls as well, at least until the adhesive has fully cured. This prevents the panels from sliding or shifting before the bond sets.
-
For hollow drywall, use drywall anchors in combination with screws rather than relying on adhesive alone to carry the full load.
How Do You Style a Wood Panel Wall?

A wood panel wall is a design element that can go in many directions depending on the finish, the room, and how it's accessorized. Here are some of the most effective approaches:
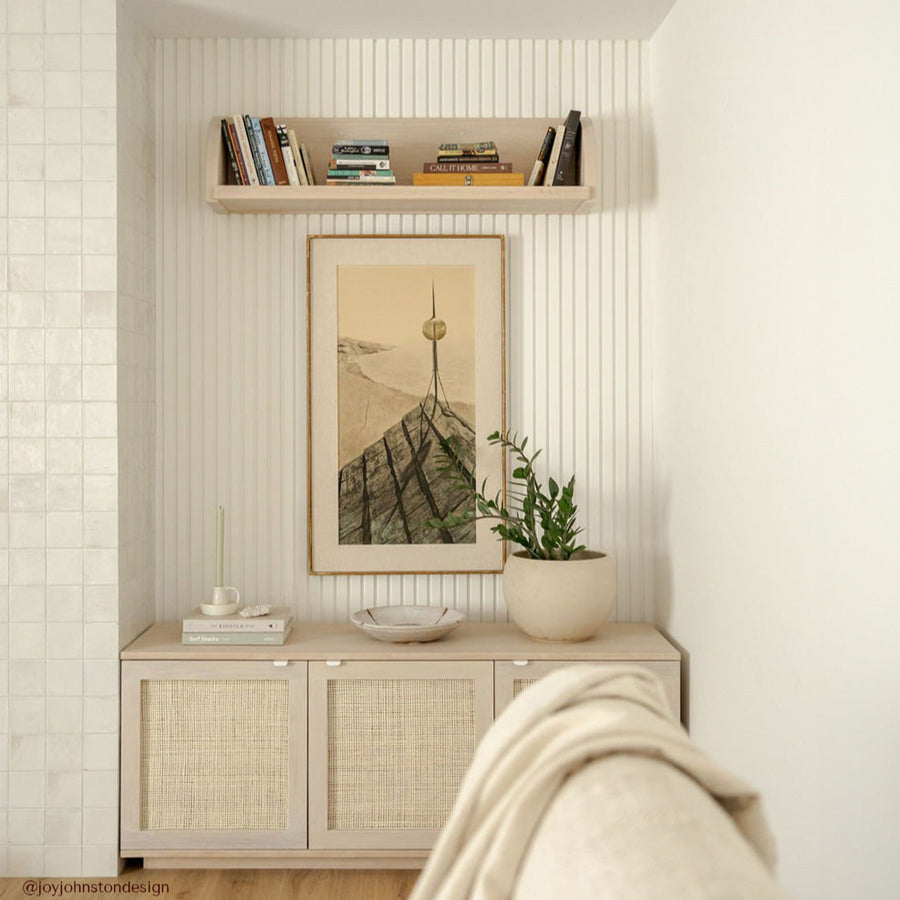
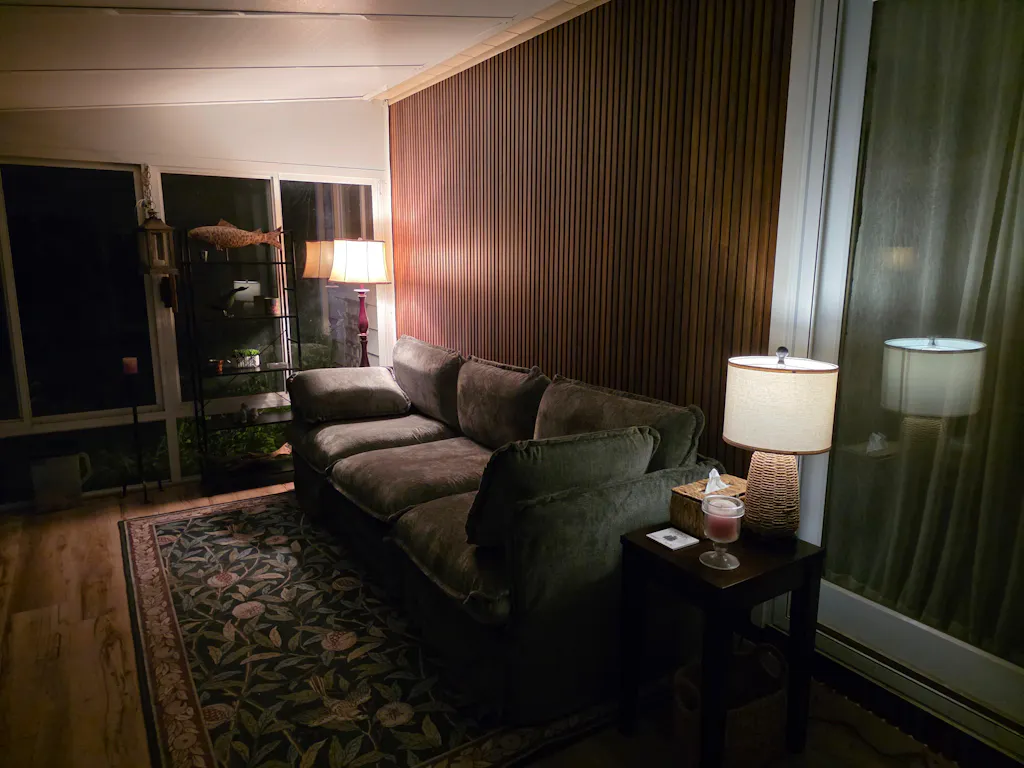
Let the wood be the feature. A pre-finished walnut or white oak panel wall needs very little else to make an impact. Pair it with simple, understated furniture and let the grain and texture do the work. This approach works especially well in bedrooms and home offices.
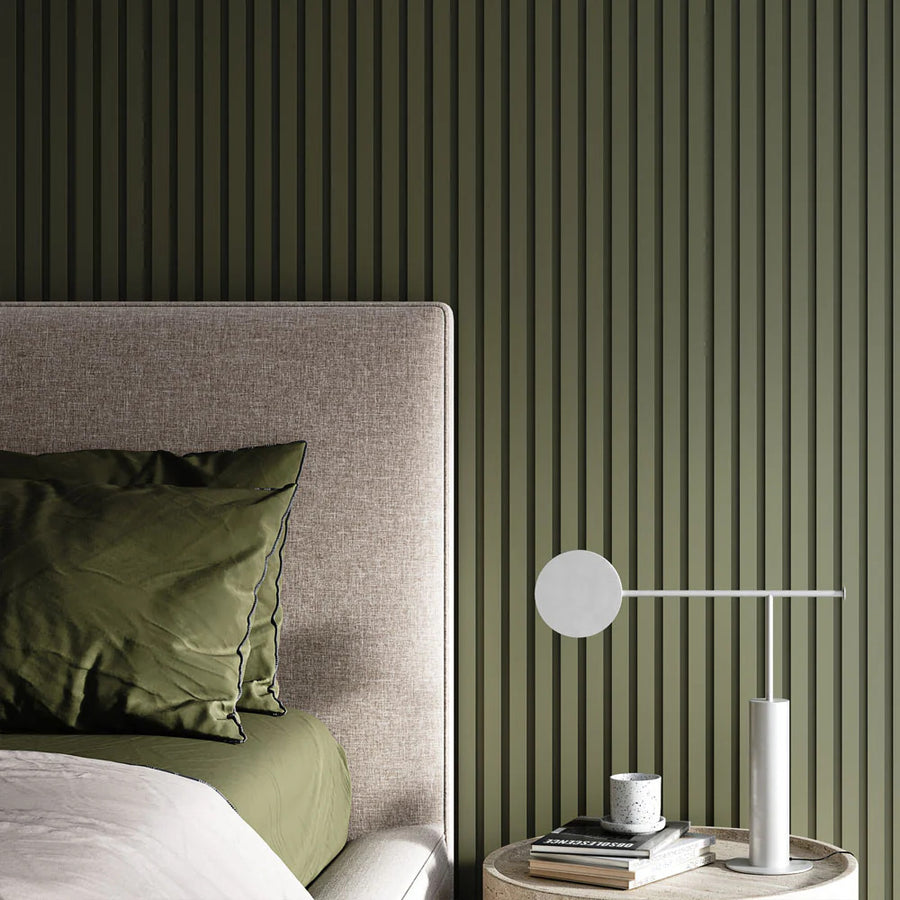
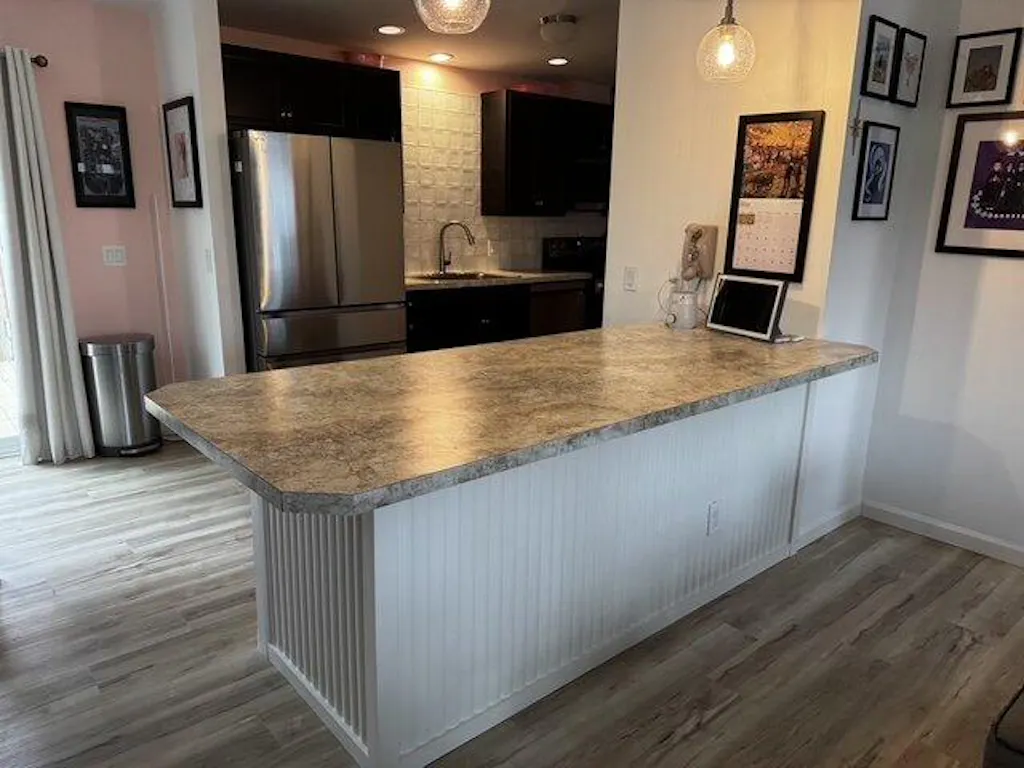
Paint it. Paintable panels in fluted, ribbed, or V-groove profiles offer complete color flexibility. A deep charcoal, forest green, or warm off-white can completely transform the character of a room. Because the panels are primed before painting, they accept paint cleanly and evenly.
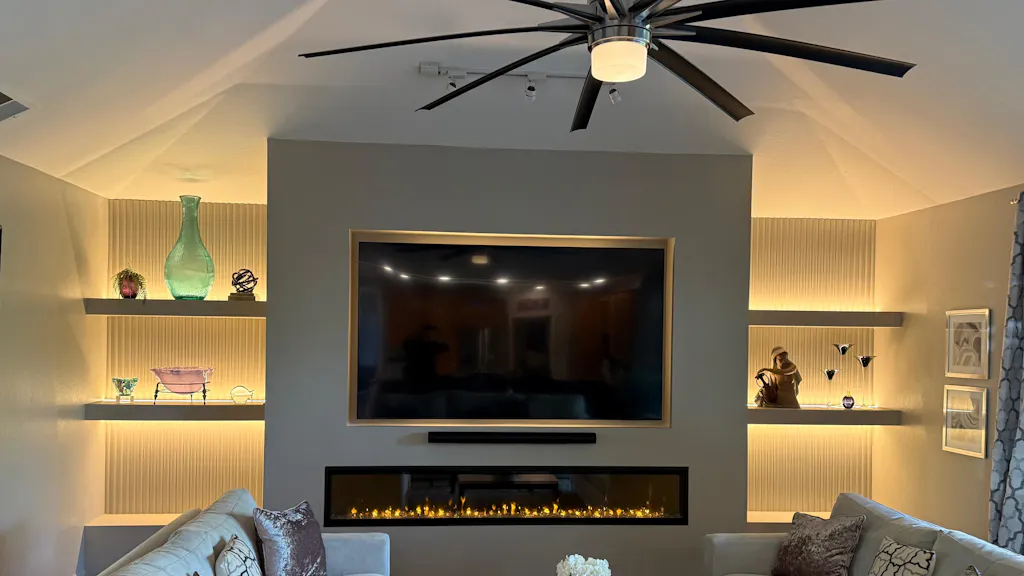
Use it as a backdrop for art and lighting. A fluted or slatted panel wall provides an excellent textured backdrop against which framed artwork, sconces, and floating shelves stand out more dramatically than they would against a flat painted wall.

Create wainscoting. Half-height panel installations using 44" half-length panels are a popular way to add character to dining rooms, hallways, and staircases without committing to a full floor-to-ceiling treatment. Finish the top edge with a simple trim piece or chair rail for a polished look.
Take it to the ceiling. Extending a panel treatment from the wall onto the ceiling creates a wraparound effect that feels immersive and architectural. Most wall panel systems can be adapted for ceiling installation — check that your chosen product supports this before purchasing.
What Are Common Wall Paneling Mistakes to Avoid?
Even straightforward installations can go wrong if a few key steps are overlooked. These are the mistakes that come up most frequently:
Skipping acclimation. As noted above, MDF-based panels need time to adjust to their environment before installation. Installing panels straight out of the box — particularly in a newly built or recently renovated space where humidity may be elevated — is a reliable path to warping, joint failure, and cracked surfaces down the line.
Poor layout planning. Starting installation without mapping out the full wall first is a common mistake. You may end up with an awkwardly narrow strip of panel at one end of the wall, or find that your outlet cutouts land in inconvenient places. Measure twice, plan fully, then cut.
Ignoring surface preparation. Panels applied to dirty, damp, or uneven walls won't adhere properly and won't look right. Clean the surface, check for flatness with a level, and address any significant irregularities before starting.
Using the wrong tools. Cutting MDF or wood veneer panels with a dull blade produces ragged, splintered edges that are difficult to conceal. Always use a sharp, fine-toothed blade, and consider applying masking tape along cut lines to minimize splintering — particularly important when cutting real wood veneer panels.
Underestimating environmental control. Wood-based panels are sensitive to humidity. Installing them in spaces where temperature and humidity fluctuate significantly — unheated garages, basements with moisture issues, spaces adjacent to steam showers — without taking appropriate precautions will shorten their lifespan considerably. Most manufacturers require that humidity be maintainable between 35–50% to keep warranties valid.
Choosing the wrong adhesive. Not all construction adhesives are compatible with PVC-backed panels. Always check that your adhesive is rated for PVC and/or all surfaces before applying.
Is It Expensive to Wood Panel a Room?

Wood panel walls typically cost between $7 and $22 per square foot for the materials alone, depending heavily on the type of panel chosen. Here's a practical breakdown of what to expect at different price points:
$7–$11/sqft — Paintable MDF panels. This includes paintable fluted, ribbed, and V-groove panels that you paint yourself after installation. The material cost is modest, but factor in the cost of primer (if an additional coat is needed), paint, and the time investment of finishing the surface on-site. These are an excellent choice for large areas or budget-conscious projects.
$13–$17/sqft — Composite and flexible wood panels. Exterior composite slat panels fall at the lower end of this range and offer exceptional durability for outdoor applications. Flexible ribbed wood veneer panels sit at the higher end and are ideal for curved surfaces and complex millwork.
$18–$22/sqft — Premium real wood veneer panels. Acoustic wood slat panels, fluted wood veneer panels, and tongue-and-groove wood panels all fall in this range. These arrive pre-finished — no painting or staining required — and deliver the warmth and texture of real wood at a fraction of the cost of solid timber cladding.
For context, solid hardwood wall cladding typically starts at $25–$40/sqft or more, making engineered wood veneer panels a genuinely compelling alternative for most residential applications.
Beyond materials, budget for any trim pieces, adhesive or fasteners, and the cost of professional installation if you're not taking the DIY route. For a typical 150 sqft accent wall using mid-range panels, total material costs will generally fall between $1,500 and $3,000.
Wall Paneling Comparison: Which Type Is Right for You?
Not sure which panel type suits your project? Use this table to compare the most common options across the factors that matter most.
| Panel Type | Cost / sqft | Installation Difficulty | Aesthetic Level | Availability | Prep Work Required |
|---|---|---|---|---|---|
|
Paintable MDF Panels Fluted, Ribbed, V-Groove |
$7–$11 | DIY Friendly | Budget–Elevated | Order Online | Pre-primed; fill seams, paint on-site |
|
Acoustic Wood Slat Panels Real wood veneer on felt backing |
$18–$21 | DIY Friendly | Premium | Order Online | Pre-finished; no painting or staining needed |
|
Fluted Wood Veneer Panels Real wood veneer, MDF core |
$20–$22 | Confident DIYer | Premium–Luxury | Order Online | Pre-finished; fill nail holes with matching wood filler |
|
Shiplap Painted MDF or pine |
$3–$8 | DIY Friendly | Budget | Hardware Store / Order Online | Sand, prime, caulk gaps, paint on-site |
|
Raw / Rough Lumber Unfinished solid wood |
$5–$15 | Expert DIYer–Professional | Elevated–Luxury | Lumber Yard (hand-select) | Sand, remove defects, fill cracks, stain, seal, finish |
|
Solid Hardwood Cladding Milled solid hardwood |
$25–$40+ | Professional Recommended | Luxury | Lumber Yard / Specialty Supplier | Mill, sand, stain or oil, finish; acclimate on-site |
Have questions about a specific panel type or installation scenario? The best panel for your project depends on your wall surface, room conditions, and finish preferences — it's worth taking the time to match the product to the application. Feel free to contact us with questions before starting your wood panel wall project!


Leave a comment